Sunday, November 4, 2012

Bonus Meeting: Making giant, lighted holiday ornaments


Maybe you saw them hanging last year from the trees in Jill and Matt Jones' front yard, or maybe you've seen them in other parts of town: these illuminated holiday balls look gorgeous during the holiday season!  In Greensboro, where Jill is from, they are so popular that many streets are lined with house after house of lighted Christmas ornaments.

On Sunday, Nov. 4, Matt Jones taught about 20 members of the club how to make them. And it was easy!!  For those of you who missed the workshop or who want to make more, here's how to do it:

Materials:
A 4-foot length of chicken wire (1" mesh)
A pair of work gloves
Two strands of 100-count mini Christmas lights
Wire cutters
3-prong, outdoor adapters
Outdoor extension cords

Instructions: 
1. Trim a 4-foot length of wire from the roll.
2. Form the cut ends into a cylinder, overlap by a few inches and begin twisting the cut ends together.
3. Next, close one end of the cylinder by folding in three or four sides, similar to how you would wrap the edges of a gift, and twist their edges together. Then do the other side of the cylinder. You can use small cut pieces of wire to hold pieces together if necessary.
3. Keep molding the wire until it resembles a sphere
4. Loop the male end of the first strand of lights through the wire, secure it with a simple knot and  wrap the lights around the ball, trying to cover as much area as possible.
5. Plug the second strand into the female end of the first strand  and finish stringing the lights around the ball. Tie off the female end of the lights to secure it in place. 
6. You may want to leave a long end hanging off to connect to another ball wtihout an extension cord.
7. To get it into the tree, tie an extension cord to a heavy object and throw it over a branch. Then plug it into your first ball and hoist it up.

There's also a video here on how to make them.

We're looking forward to seeing all of your holiday balls this year in Govenor's Square!!!

Wednesday, October 24, 2012

October Meeting: Arranging bookshelves, mantles and coffee tables


Bronwyn Ford of Bronwyn Designs gave an interesting and insightful presentation at our October meeting in how to arrange bookshelves, mantles and coffee tables. A few highlights:

Bookshelves 
  • Don't forget books: The No. 1 thing you need to have is books. Just vases and candles and pictures doesn't look real. Books add color, texture and height.. If you want to fill it up with books, great. Otherwise, you can fill in the extra spaces with interesting things.
  • Other stuff to have: Bookends, paperweights, vessels (bowls, vases, boxes), framed photographs, 3D items and artwork. 
  • Add depth: It's great to have some things toward the front of the shelves and some things toward the back. Artwork leaned against the back is fantastic for this. Also, pairs of things work well. 
  • Have varying heights.
  • Consider painting or using wallpaper on the back of your bookshelves. It really makes them pop.  
  • Consider hanging artwork or mirrors on the front of your bookshelf
  • Pull things together that are similar. Maybe it's a bunch of white things or things that are silver, or choose two objects of the same bright turquoise. 
Coffee Tables

  •  A tray or basket: This is the No. 1 thing you ened to corral things like remote controls and magazines. Especially important if you have a soft coffee table.
  • Choose objects that look good from all angles. No framed photographs or things that have backs. Good choices: Coffee table books (use them to make a pedestal for your bowl), vessels with something in them, pillar candles, ceramics, a magnifying glass (looks great on top of a pile of books) 
  • Create groups of three.
Mantles 
  • Pick a theme. Is this a country house or more modern?
  • Basic steps: Center a large piece on the mantle. One one side, place items of varying height. ON the other side, add a vessel with some weight like a big vase. You can stop there or you can layer some framed pictures in a cluster on one side and balance the opposite side with a group of boxes.
  • If you have a TV, either don't put anything on there or put a pair of vases on each side.
  • In your fireplace, some ideas: pretty birch logs, a ton of candles of different heighs, a pretty screen, a big basket with dried hydrangeas
Other tips
  • A great place to find beautiful boxes is Metrolina Tradeshow Expo, Sleepy Poet on South Boulevard or Cotswold Marketplace
 See Brownwyn's entire Powerpoint presentation, with all of her tips, here

Still have questions? Check out Bronwyn's website or reach her at 704-968-5099 or info@bronwyndesigns.com.

Tuesday, September 11, 2012

September Meeting: Fall Planting & Pruning


Trevor O'Reilly of TnT Lawnscapes, a landscaping and lawn care company that focuses on organic methods, was back to talk to us about fall planting and pruning. A few of his tips:
  • Now is the time to aerate and seed your lawn. Because of our clay-like soil, aerating is essential for the health of your grass. 
  • Do a soil test. It's not as hard as it sounds. Simply pick up some boxes at your local extension agent (the closest one is probably at 1418 Armory Drive off 7th Street), fill them with soil from your planting beds and your lawn and mail them in. You'll get back a report that tells you about the soil in each location and what it needs. (Hint: If you have trouble reading it, Trevor can help.)
  • Plant new shrubs and trees in the fall, not the spring. All the Garden Centers have beautiful flowering shrubs and trees in the spring, but planting at that time of year is tough if you don't have an irrigation system. New plants often don't survive our hot summers, Trevor says: "Not watering for a week during a Charlotte summer can kill young trees and shrubs." A better idea? Plant in the fall or even in the winter, as long as the ground doesn't freeze.
  • Don't just drop your new plant into the ground. Make sure you dig a hole at least twice the size of the root ball and mix some good stuff (peat moss, soil conditioner, sand) in with the clay. Also, don't forget to break up and loosen the root ball with a knife to encourage the roots to grow into the soil. If the plant has a burlap root ball wrapped with twine, just leave it on there; it will biodegrade. If it has a cage, put the root ball into the ground first, and then cut the cage.
  • Winter is best for transplanting. Have some plants you want to move? Prune them first to ease the transition, and then do it when they're dormant in the winter. Dig out the biggest root ball you can and then follow the guidelines above. If it's a particularly big plant, you probably need heavy equipment and it may end up costing you less simply to remove it and buy a new plant. 
  • Remember, plants grow. When you get a new plant, read the tag! If it says your Loropetulum will grow to be 8-feet-tall and 8-feet-wide, it really will grow that big, Trevor says. So don't plant it two feet from your house!
  • Pruning Rule-Of-Thumb: Don't take off more than a third at any one time.  But you can take off a third this year and another third next year.
Here are two more resources that Trevor recommends:
Planting Techniques for Plans & Shrubs: http://www.ces.ncsu.edu/depts/hort/hil/hil-601.html
Growing a Fall Vegetable Garden: http://www.ces.ncsu.edu/depts/hort/hil/hil-8001.html
  

Have more questions or need someone to do the work for you? Call Trevor O'Reilly at 704-661-5697 or email him.

Tuesday, April 24, 2012

April Meeting: Making Compost

Drosera Capensis

Trevor O'Reilly of TnT Lawnscapes, a landscaping and lawn care company that focuses on organic methods, taught us about composting. Composting creates and improves soil and reduces land waste. A lot of what we throw away could be composted; a third of landfill waste is compostable.

The first step to composting is figuring out where you are want to put your compost pile. It can be as simple as a pile in the backyard or as fancy as an expensive roller composter. There are two methods for composting: hot and cold. Hot is faster and more complex; it needs to be in the sun and should stay wet to maintain heat. The cold method is slower and easier. To build a simple bin, start with larger sticks on the bottom to create air flow. Layer dry and moist yard waste; the yard waste needs to have nitrogen (weeds, grass, greens, rinsed egg shells) and carbon (pine needles, fall leaves, cow manure). You need to flip it as the leaves stick at the bottom. The next step is to collect items to compost, such as vegetable scraps from your kitchen (no meat) and yard waste (weeds are okay but unless they have started to produce seeds, though may want to avoid avocado seeds as they will grow and suck up all the nutrients). Trevor collects his kitchen scraps in a kitchen compost bin; it has two charcoal filters to reduce smells. He also uses a drosera capensis, a carnivorous plant that eats fruit flies, which tend to pop up around the scraps. Composting can take 3-4 months to produce usable compost but usually the average is a year. However, despite the work and patience, producing good nutrients for your yard that are natural and inexpensive have long reaching benefits.

March Meeting: 365 Nights, A Memoir of Intimacy


Charla Muller was our March guest. The author of 365 Nights, A Memoir of Intimacy, which chronicles the year that she promised her husband sex every night for a year as a gift for his 40th birthday, and the stronger marriage that resulted as they made intimacy a priority. After the year was over, Charla met a book agent who encouraged her to write the story about the memorable year. When the book was published, she was interviewed on Oprah, Today Show, The View, and NY Times, among others. She shared with us her "Five Lessons Learned" as a result of her "year" and the resulting media attention.

1. Intention is Everything: Charla read an article once that said that if you could take a snapshot of your day, you would see what is most important in your life. Before "the year," her snapshot would have included everything except her husband. Part of what inspired her gift idea was that she wanted to make her husband the center of that snapshot again; intimacy was a way of having a meaningful connection.

2. Why Not Me?: When Charla's book editor first approached her about writing the book, Charla didn't see herself as the kind of person who could write that book. However, she discovered that it is okay to dream big and have big things happen to you. We can let so many outside things define who we are supposed to be (i.e. body image, social expectations) that we are easily convinced that we can't accomplish our dreams.

3. Boldness with Balance: Her husband agreed to let her write the book with the counsel that she write a book that would honor marriage and their faith. His counsel became Charla's mission statement and anchored her decision-making in determining what was appropriate to share in the book and what should remain between the two of them.

4. We All Need to Have Our A Team: The "A Team" is our list of go-to people, the ones who will help us to handle the hard parts. We need to surround ourselves with affirming people and not with "life-suckers." At the same time, we need to be affirming people and not "life-suckers" too.

5. Kindness Counts: After enduring snide comments and glib remarks, Charla learned how powerful words can be and resolved to improver her own communication as well. During "the year" Charla and her husband also learned how powerful kindness is in helping intimacy, that it is easier to want to be intimate after doing thoughtful things for each other outside the bedroom. Charla enjoyed the daily kindness that existed in their marriage and loved being the center of her husband's attention, and it was something she wanted to maintain after "the year" was over.

Tuesday, February 14, 2012

Samaritan's Feet

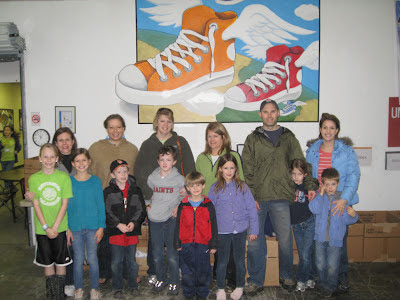
The Philanthropy Committee organized a Saturday morning service project for GSGC members and families at Samaritan's Feet. Samaritan's Feet is a non-profit group that collects new shoes and distributes them to children in need both locally and globally. We brought shoes and checks to support their cause and we also helped to prepare shoes to be shipped. We estimated that we processed 315 pairs of shoes.

We learned that for $10, the organization can make and ship a pair of shoes to a child in need. If you are interested in supporting this organization, Kim Gordon will continue to collect checks until the March meeting, so please consider giving.

Thank you to all those who participated and for the Philanthropy Committee for organizing the event!

T. Reid and Company

Our February meeting featured the some of the finest talents at the T. Reid Salon: Tonya Reid (owner), Kim Schneider (esthetician), and Noel Lance (stylist). They shared with us tips and suggestions for looking your best.

Kim Schneider, an esthetician (skin care specialist), answered several questions about skin care. The foundation for skin care is in the daily routine which should include three steps: cleanse, light exfoliation, hydration, and sunscreen. Any care you give should include more than just your face; make sure you are treating your neck and chest area as well as these areas are also susceptible to sun damage and can show age too. Good skin care begins at any age, so it isn't too early to encourage teens and kids to start good skin habits too. Using good products can make a difference in how effective the daily routine is, and Kim is happy to advise as to what products are best for your skin.


For more intensive repair, Kim highlighted the benefits of a chemical peel, which helps to reveal radiant new layers of skin that are buried underneath layers of older skin. Chemical peels are best done in the fall and spring when weather is less intense, and despite the name, don't hurt (though they might tingle a little). You will usually notice a nice glow immediately after the peel and then have some flaking three days later (something to keep in mind if you are getting ready for a big event). Microderm abrasion is another option for intense exfoliation on the face. The microderm abrasion device blasts the skin with crystals and the sucks up the dead skin, revealing new layers of skin.

Kim addressed other problems areas such as dark circles under you eyes and weak lashes. "Total Eye" is a product that repairs and conceals dark circles; it is worn during the day as part of your day routine. "Intensive Eye Repair" also helps with dark circles and it is worn at night. As for weak lashes, there is a prescription available for strengthening lashes, and T. Reid is considering carrying a similar mascara in their boutique. Kim also recommended lightly covering lashes with Vaseline at night to strengthen lashes. If you are preparing for a big event and need quick results, Tonya recommended an oxygen facial, where the face is plumped with oxygen to firm skin. In general, be careful not to overdo skin treatments, particularly treatments at home.

As for hair, Tonya and Noah gave several tips about hair care and styling. Tonya counseled that is always better to do it right first, particularly with color. It is far more expensive to do corrective color than the initial treatment, so choose wisely when you have someone color your hair. If it is time to go gray, she recommended doing it gracefully over a couple of years instead of right away. She works in lowlights and eventually brings out the sophisticated silver look.

Dry hair is common in the winter because you battle constant temperature changes, so using a moisturizing shampoo can help. Adding a smoothing agent like the Bamboo Smooth Kendi Oil (Dry Oil Mist) that she gave to Ellen Yingling can help with managing frizz. Proper hair drying technique can also help with frizz control. As Tonya said, a cat doesn't like it's fur brushed the wrong way and neither does your hair respond well when it is brushed up, so make sure to brush it down when you are drying. Power dry your hair to 80% dry and then use a ceramic round brush to finish the dry and style. If you have a concentrator tool for your dryer, use it as it will help to concentrate the hot air on the hair. As with skin, using good tools will improve your results. If your dryer is older than two years, it may not be heating your hair properly which can result in damage, so it is worth replacing. High quality flat irons, curing irons, and round brushes (look for a ceramic one with a sealed handle) can also produce pleasing results while protecting your hair from damage.

Tonya offered some tips for on-the-go styling, such as using an uplifting root blaster to freshen up a day-old style and give it volume. Pull back pieces in the front and pin in the back at the top of the crown for a more finished style (see Sarah Rowe's hair above). Looking for a fun option for your usual ponytail? For Michelle's look, Tonya added a cute braid across the front and then pulled the rest of the hair back into a trendy pigtail look. Noah also talked about styling a loose curl with a round brush. The brush size that you use will affect how tight the curl will be (the larger the brush, the looser the curl). Roll the hair onto the ceramic brush, heat it with the blow dryer, blast it with the cool shot (if you have that button), and then carefully twist the hair out of the dryer.


A darling green house on East Blvd, T. Reid Salon is a full service salon and spa as well as a boutique. Tonya, Noel, and Kim are available for appointments. Call 704-377-1511 or find them at www.treidandcompany.com.